
At long last, it is finally time for the fun part: constructing the leather tote bag! The good news is because we’ve spent a lot of time prepping our pieces, the actual construction of the bag will be a breeze. Let’s get started.
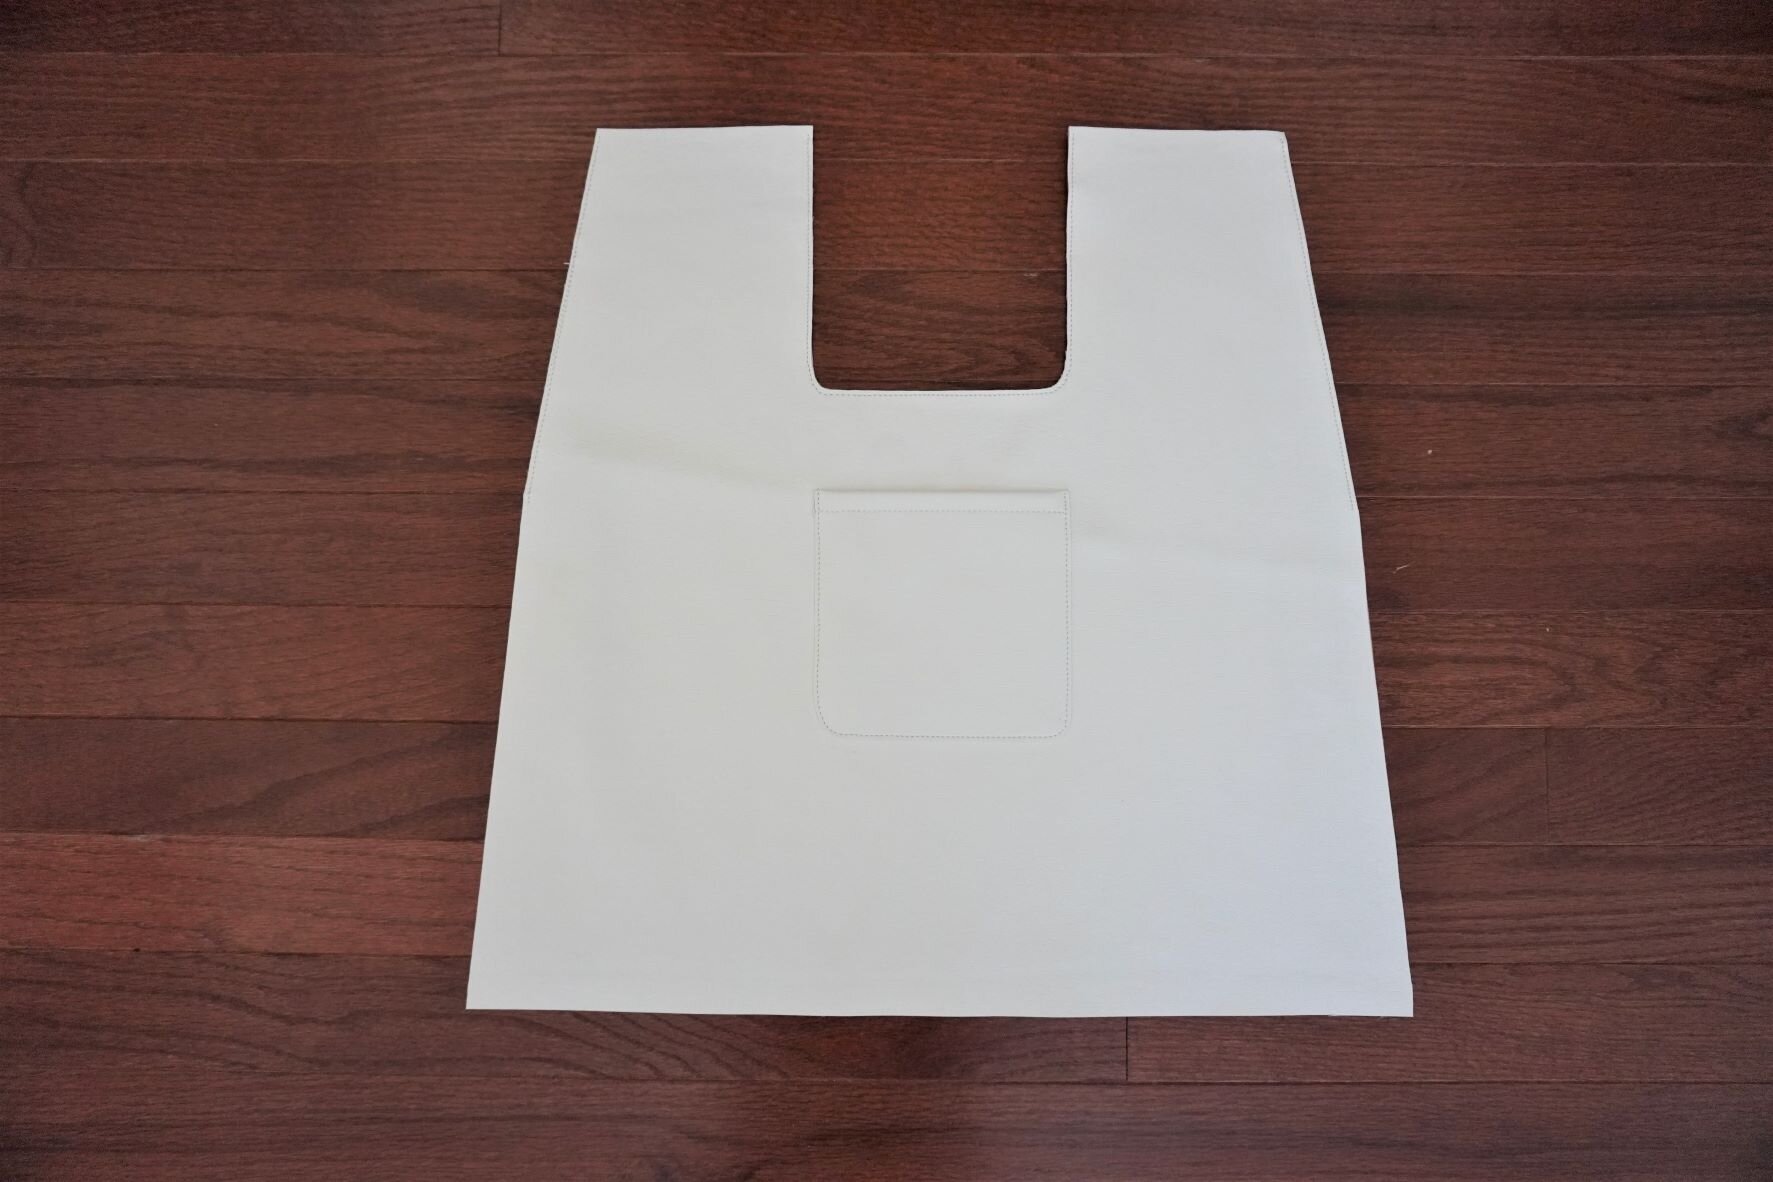
1. First, glue your pocket to the bag front using rubber cement. To do this, apply a thin layer of cement to both the pocket and the part of the bag front where the pocket will go. Allow to dry a minute or so, then adhere the pocket to the bag front. Topstitch the pocket in place.
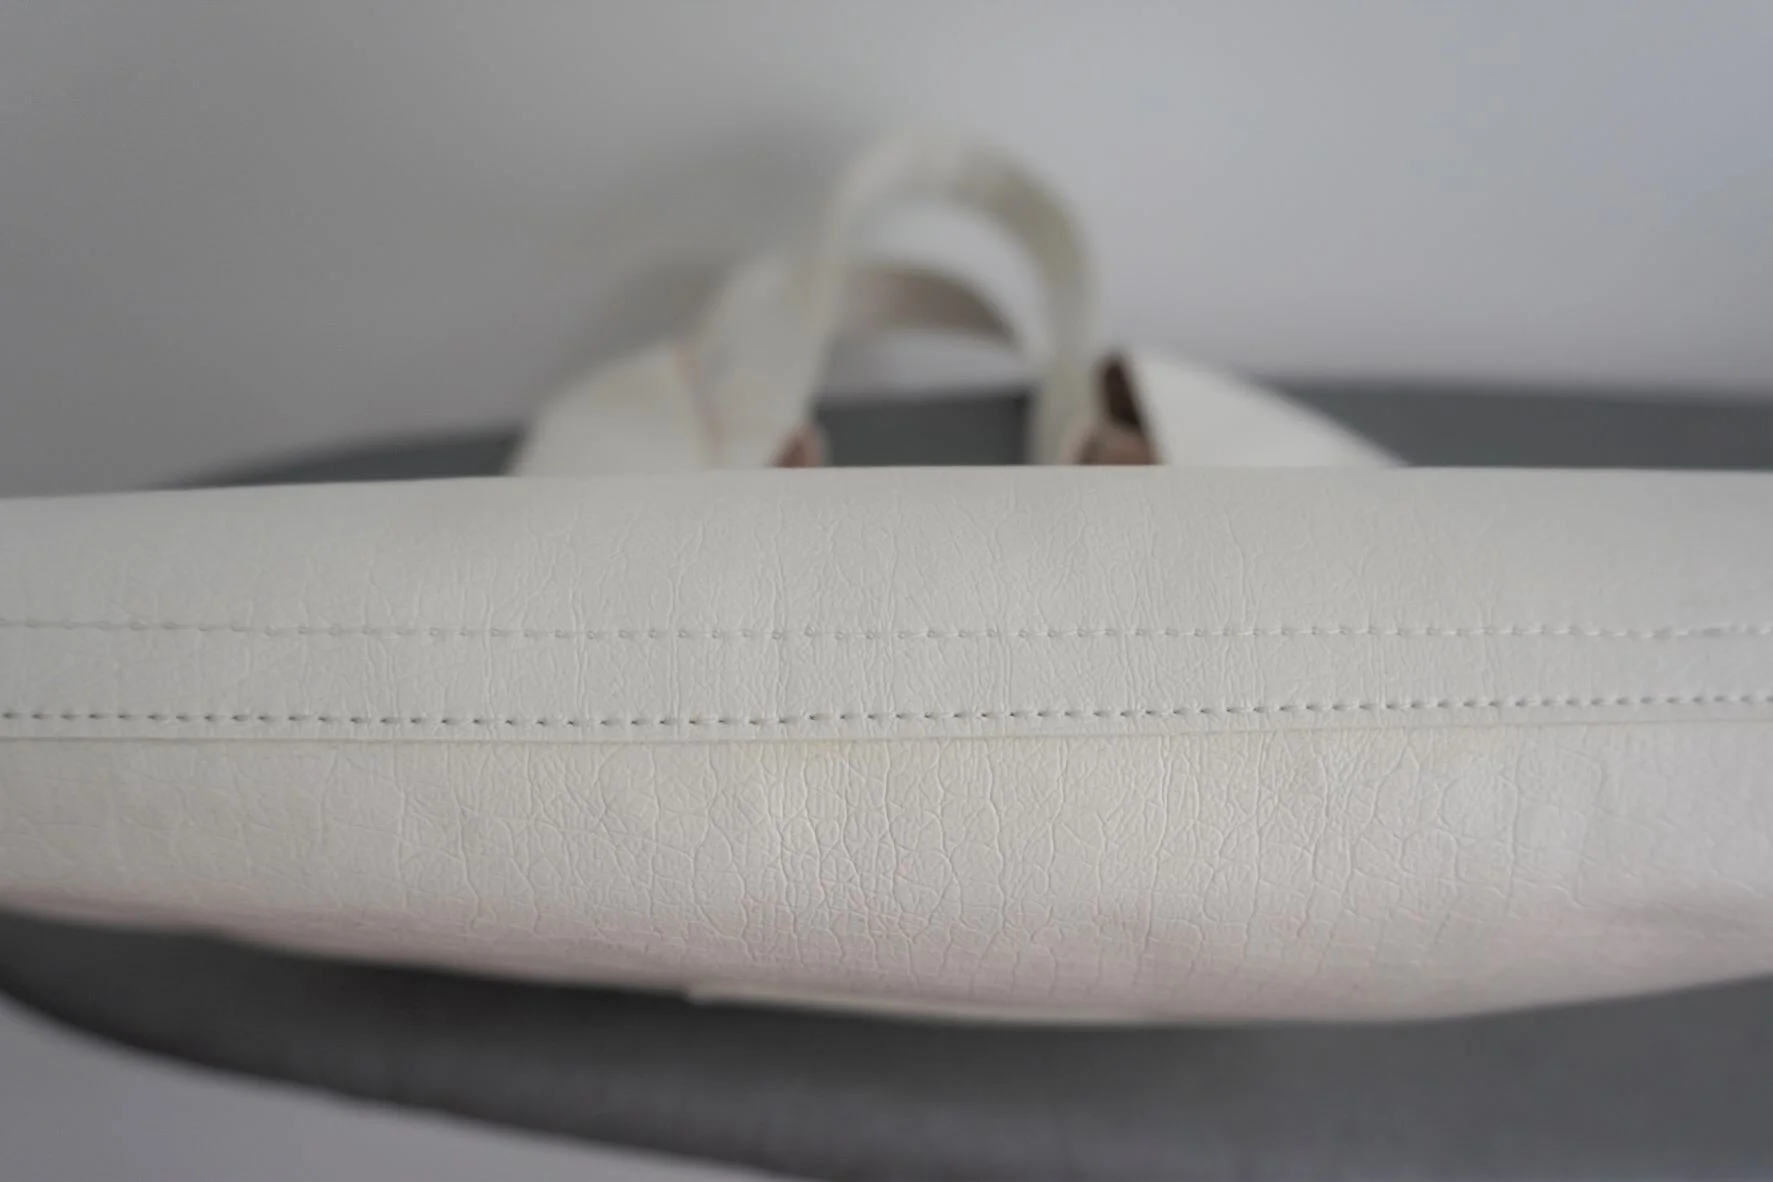
2. Next, apply rubber cement to the top edges of the bag front pieces and to the short edges of the handle pieces. Let dry for a minute or two. Glue handle to bag front, overlapping the pieces by 3/8 inch. Topstitch once near the edge of the bag front and again near the edge of the handle, so there are two lines of stitching securing the place where the handle connects to the bag front.
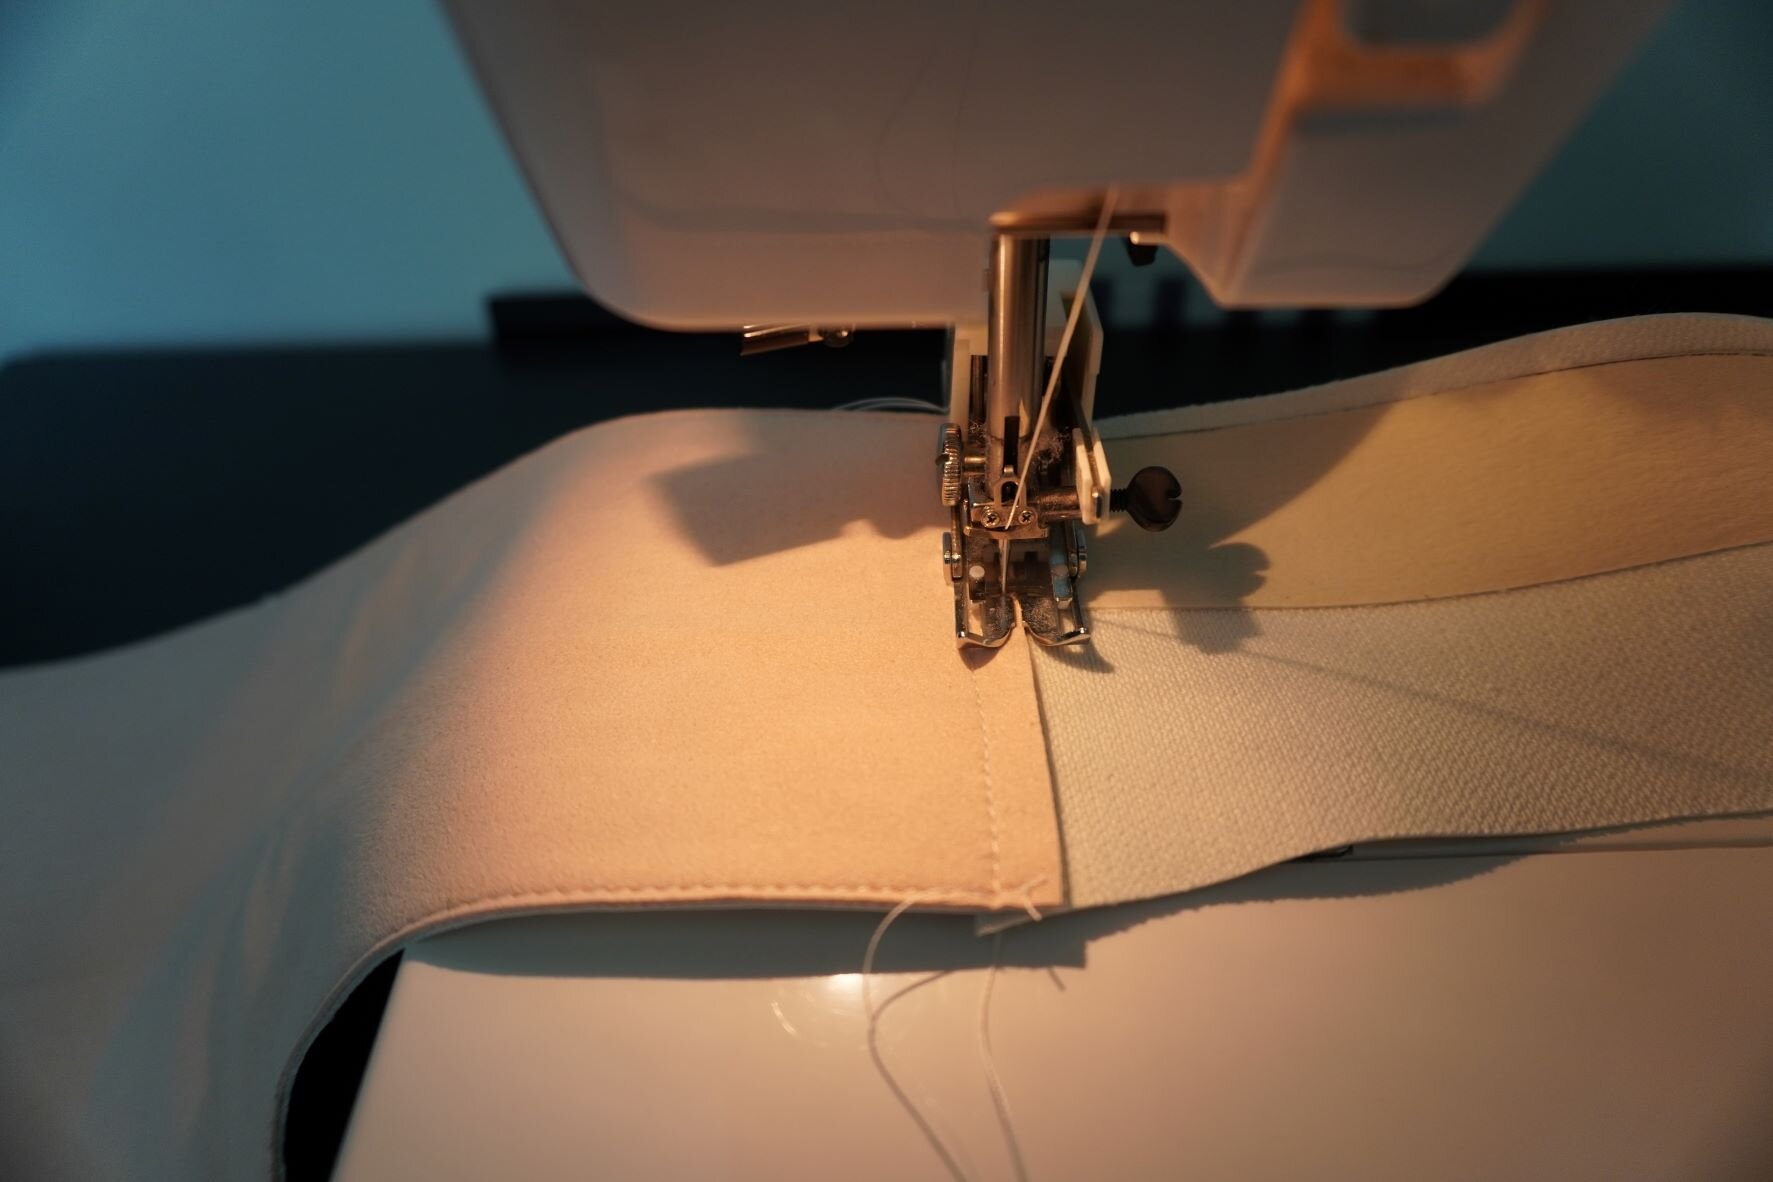
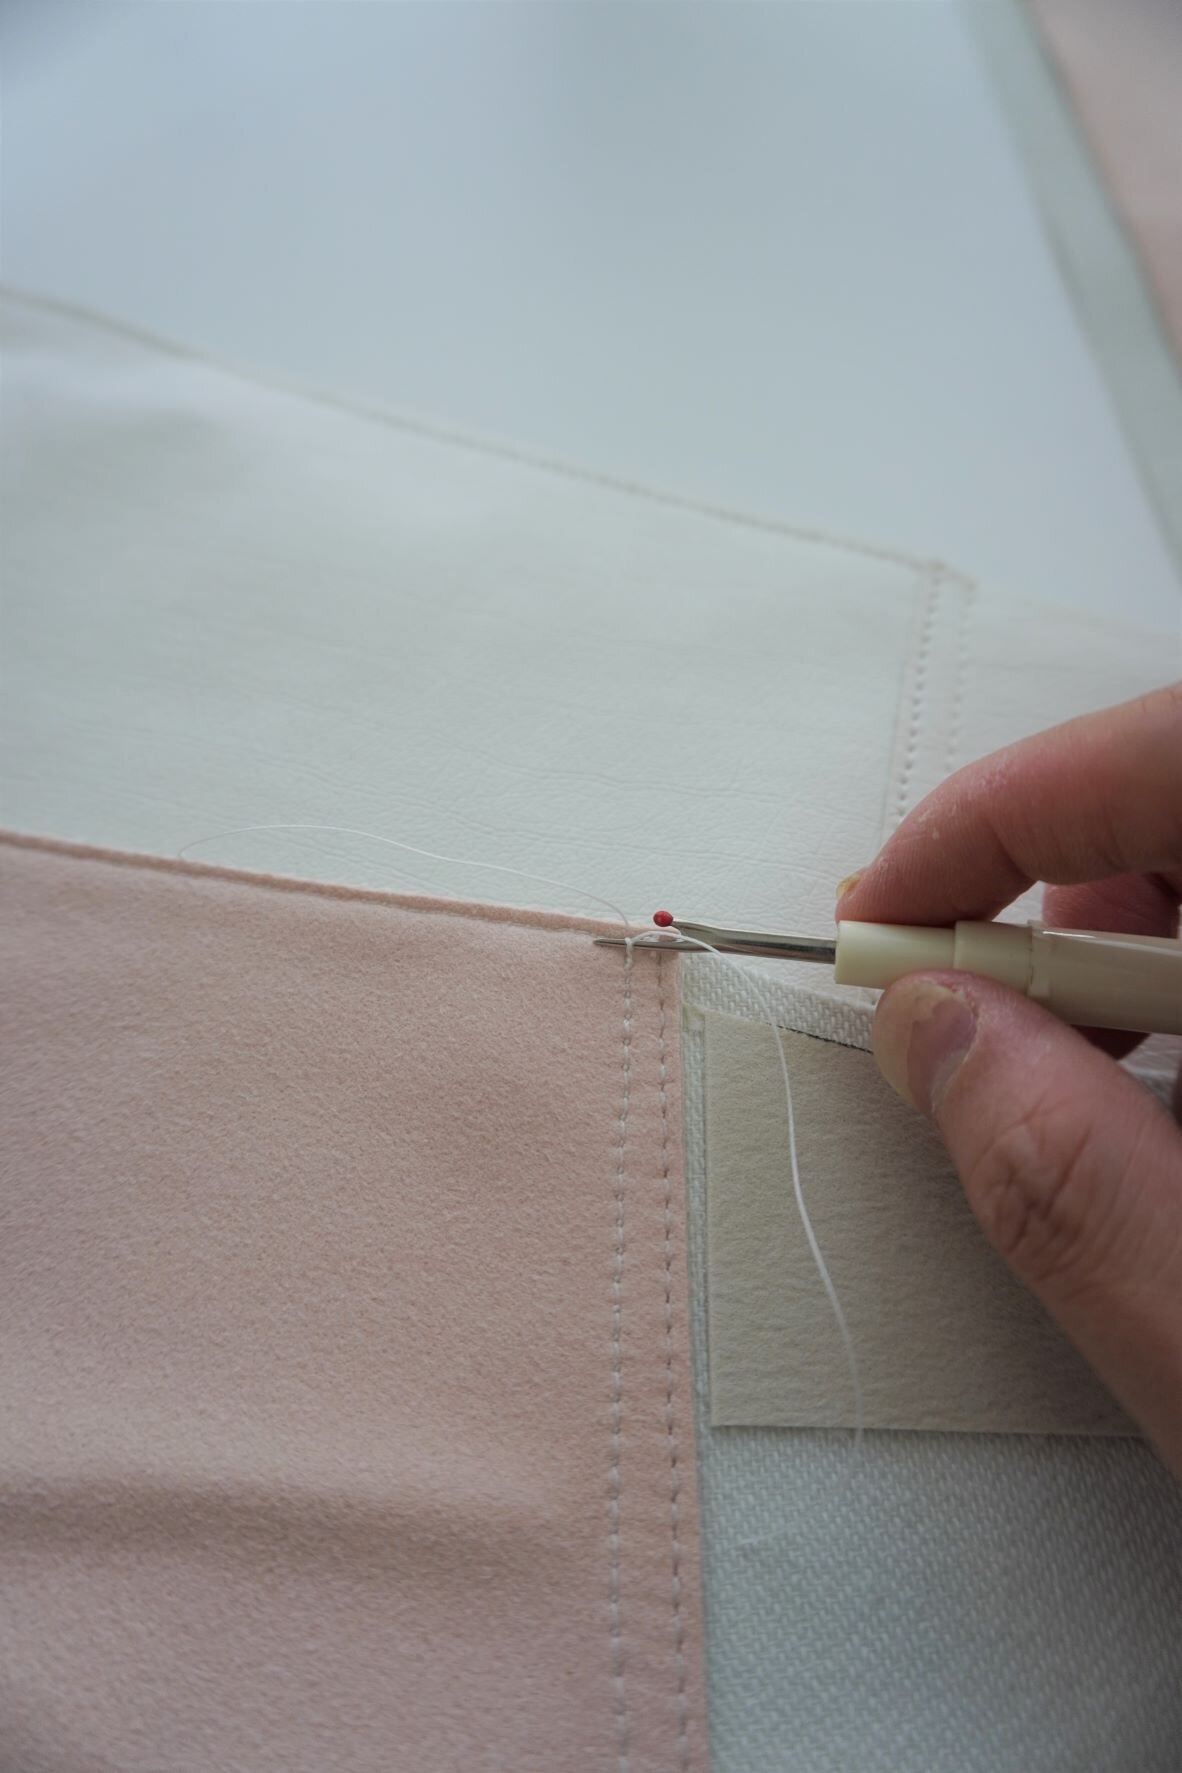
Note: DO NOT backstitch – doing so will cause the leather to bunch up and leave an unsightly clump of stitches! Instead, leave long thread tails at the beginning and end of your seam. Pull both threads to the wrong side and hand tie in a double (or even triple!) knot. Trim the thread tails. If you want an even neater look, you can clean up the tails using a thread burner or lighter. Simply use the thread burner or lighter to melt the thread tails until you get a melted ‘lump’ at the end of the stitching. This will secure your stitching and prevent it from unravelling.

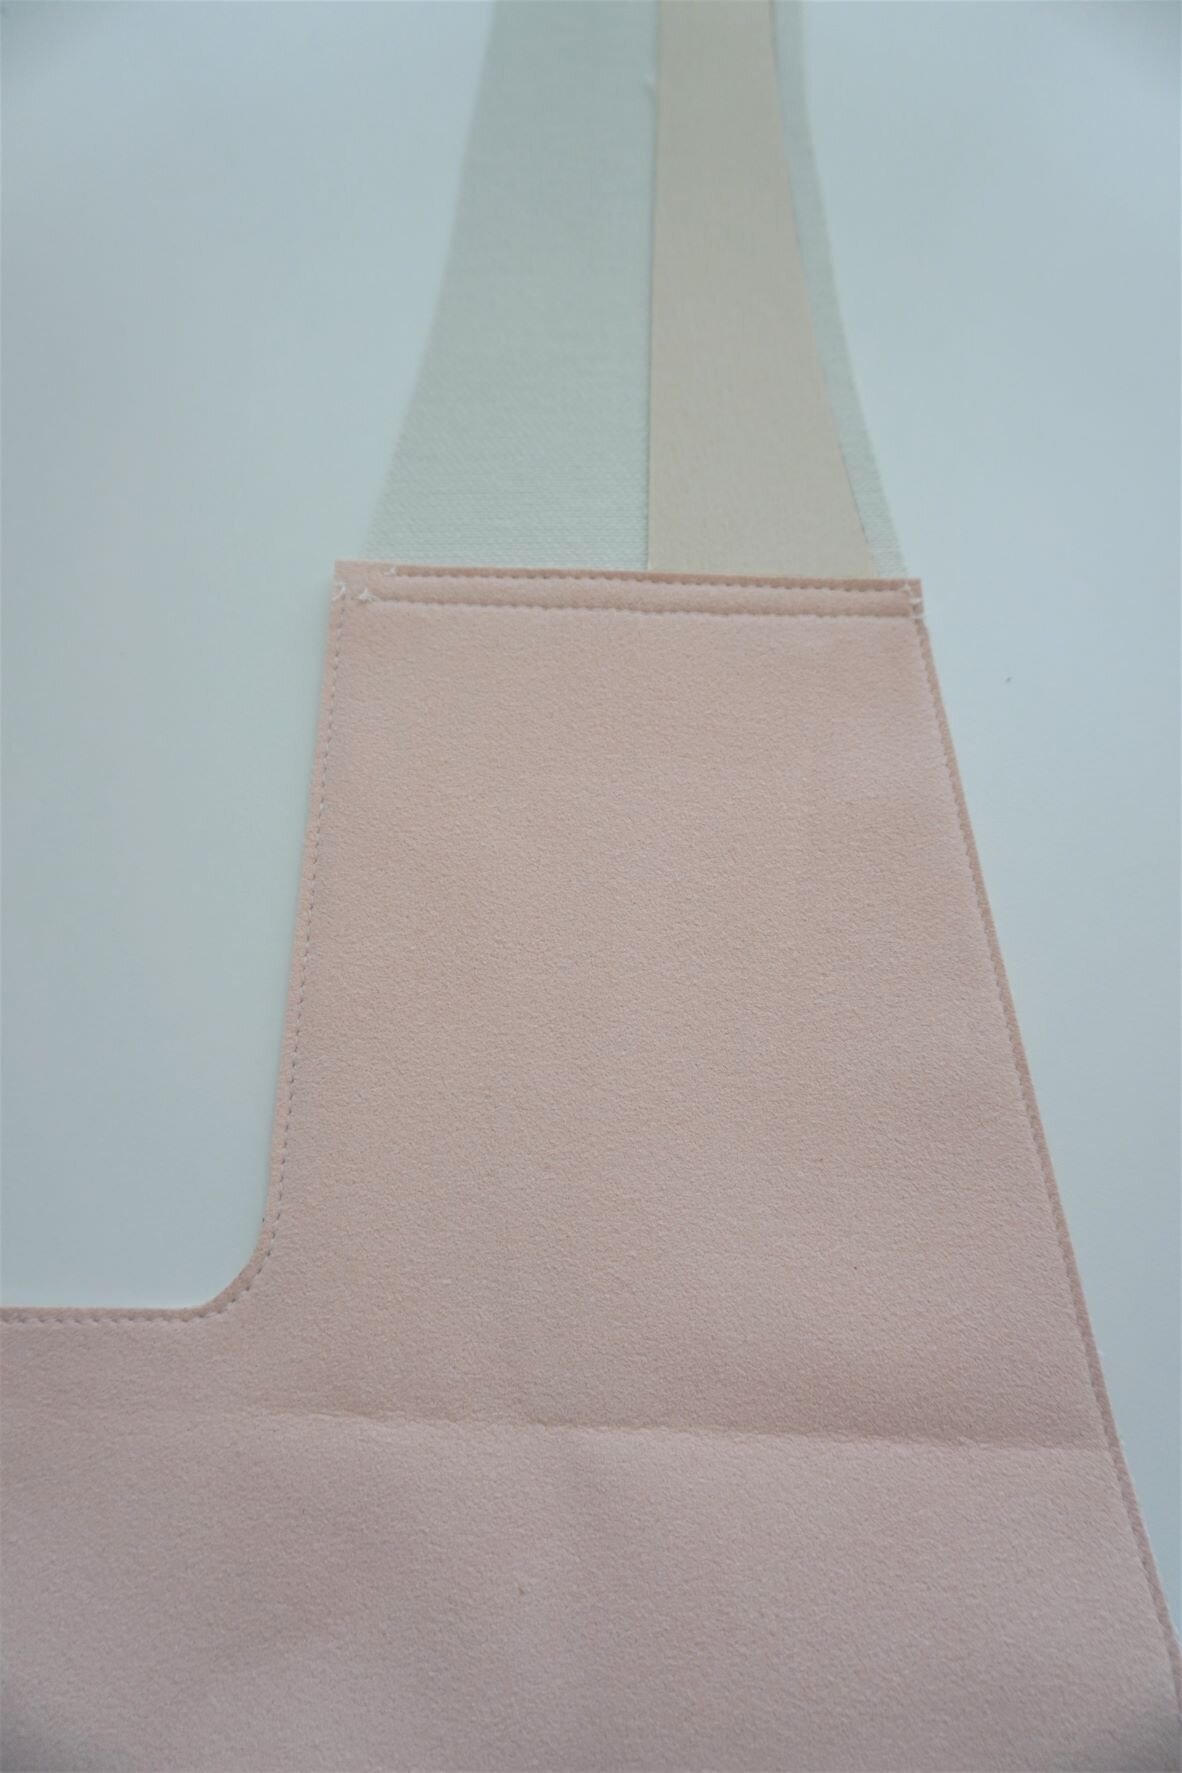
3. Apply rubber cement to the edges of the handle piece. Let dry for a minute or two. Fold the handle piece over and stick the edges together. The Decovil interfacing should now be sandwiched inside the handle. Clean up any places where the two edges are not perfectly aligned using your rotary cutter. Once you are satisfied that all of the edges are flush, topstitch down the edge of the handle.
With the handles constructed, the bag is starting to take shape!

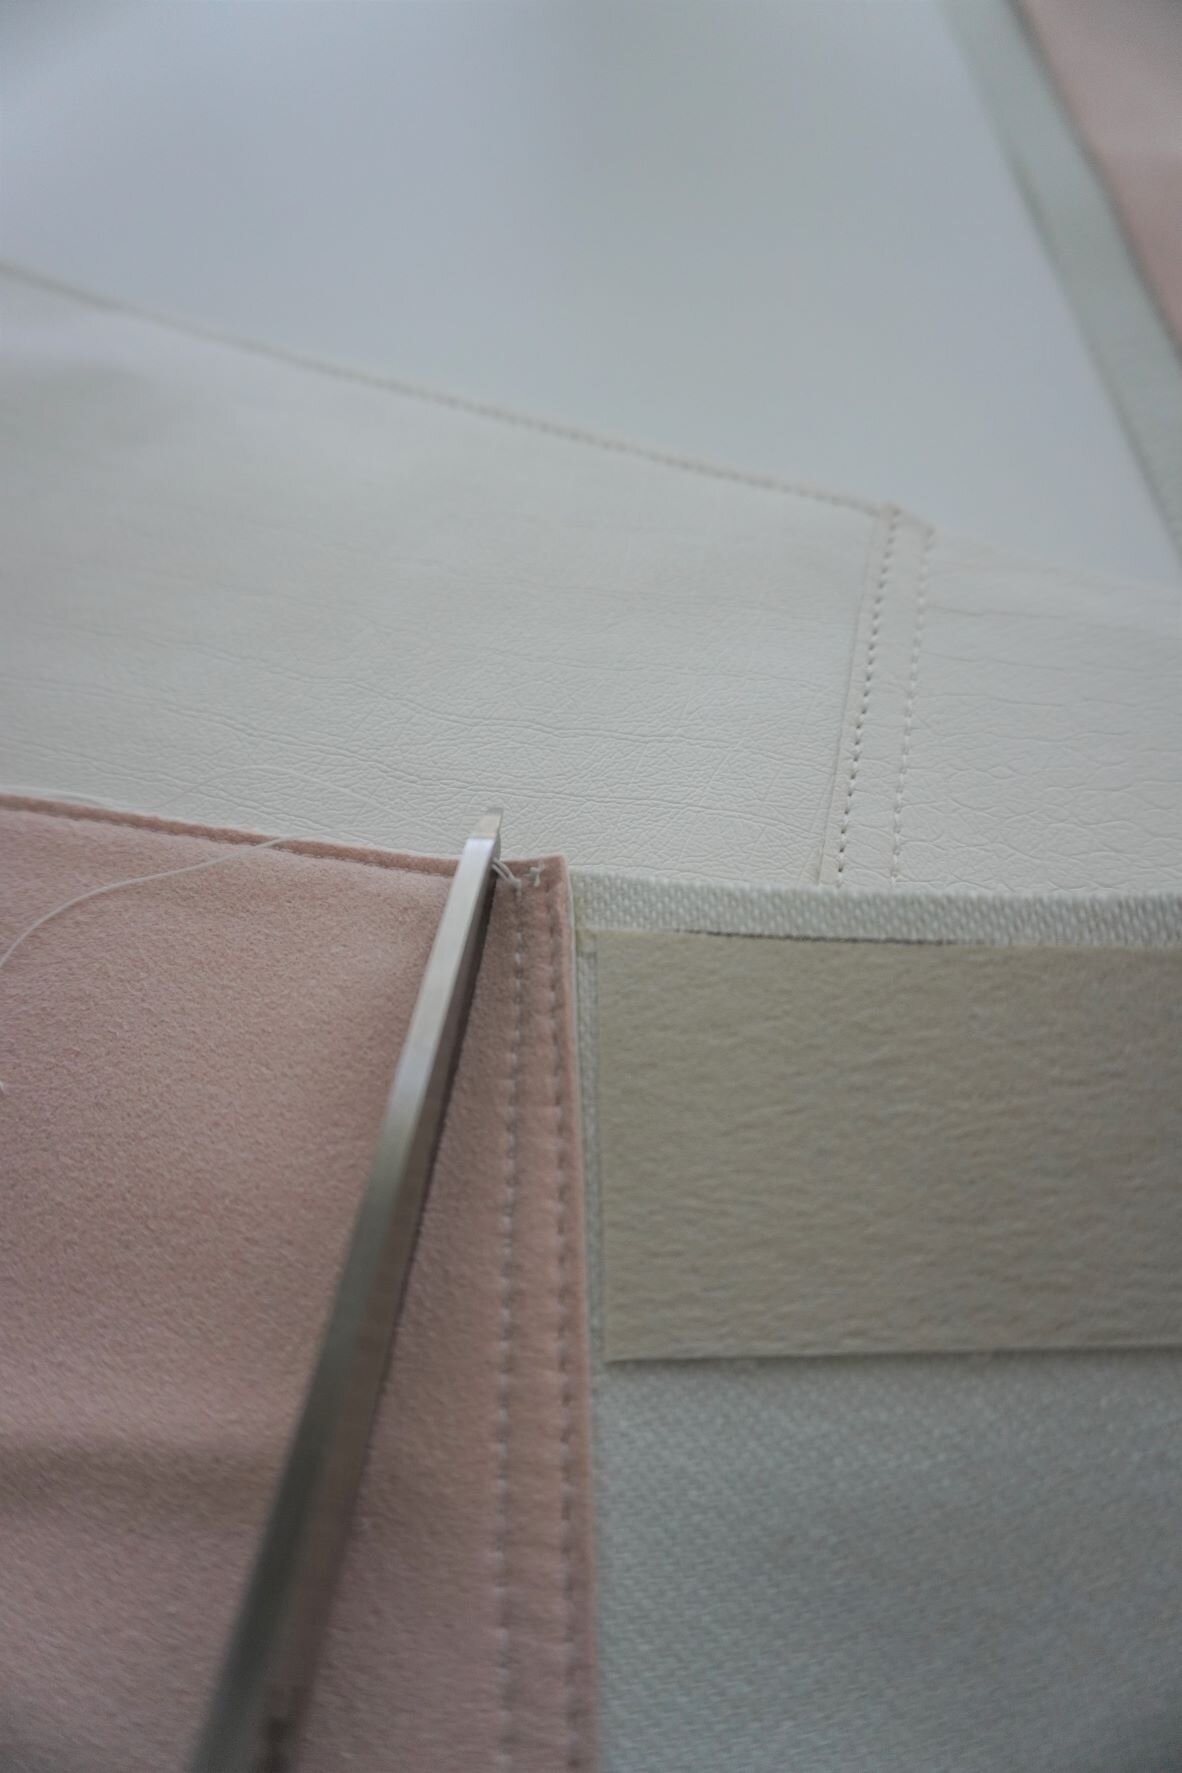
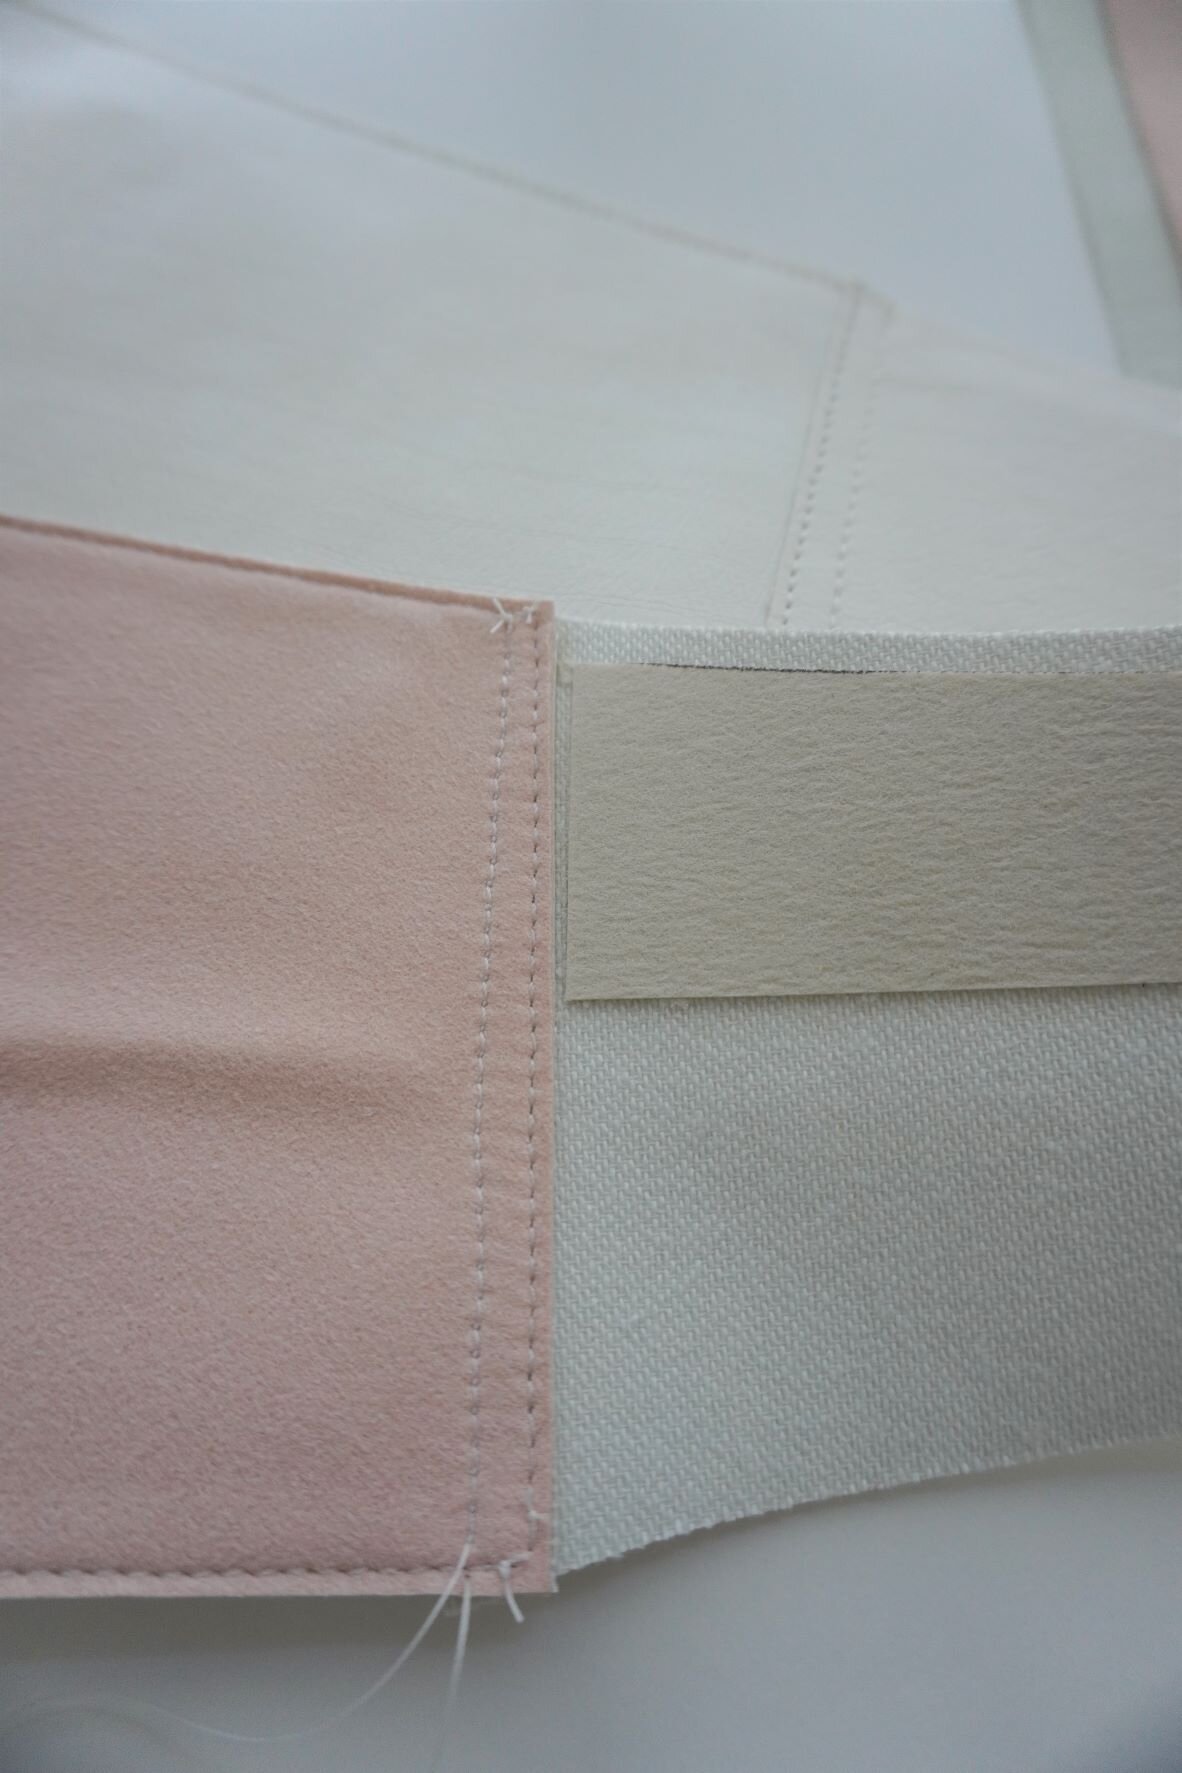
4. Next, apply rubber cement to the bottom edges of the bag front pieces. On one piece, you need to apply the rubber cement to the exterior material and on the other you need to apply the rubber cement to the lining material. Stick the bag front pieces together so one piece is lapped ½ inch over the other piece. Topstitch about 1/8 inch from the edge with the exterior material facing up. Flip the bag fronts over so the lining faces up, then topstitch again about 1/8 inch from the other edge. You should have two lines of topstitching along the base of your bag.
5. Fold the bag so the bag front pieces come together, right side to right side. Clip in place using binder clips, making sure to align the edges as best you can. Stitch down both edges, about 3/8 inch from the edge.
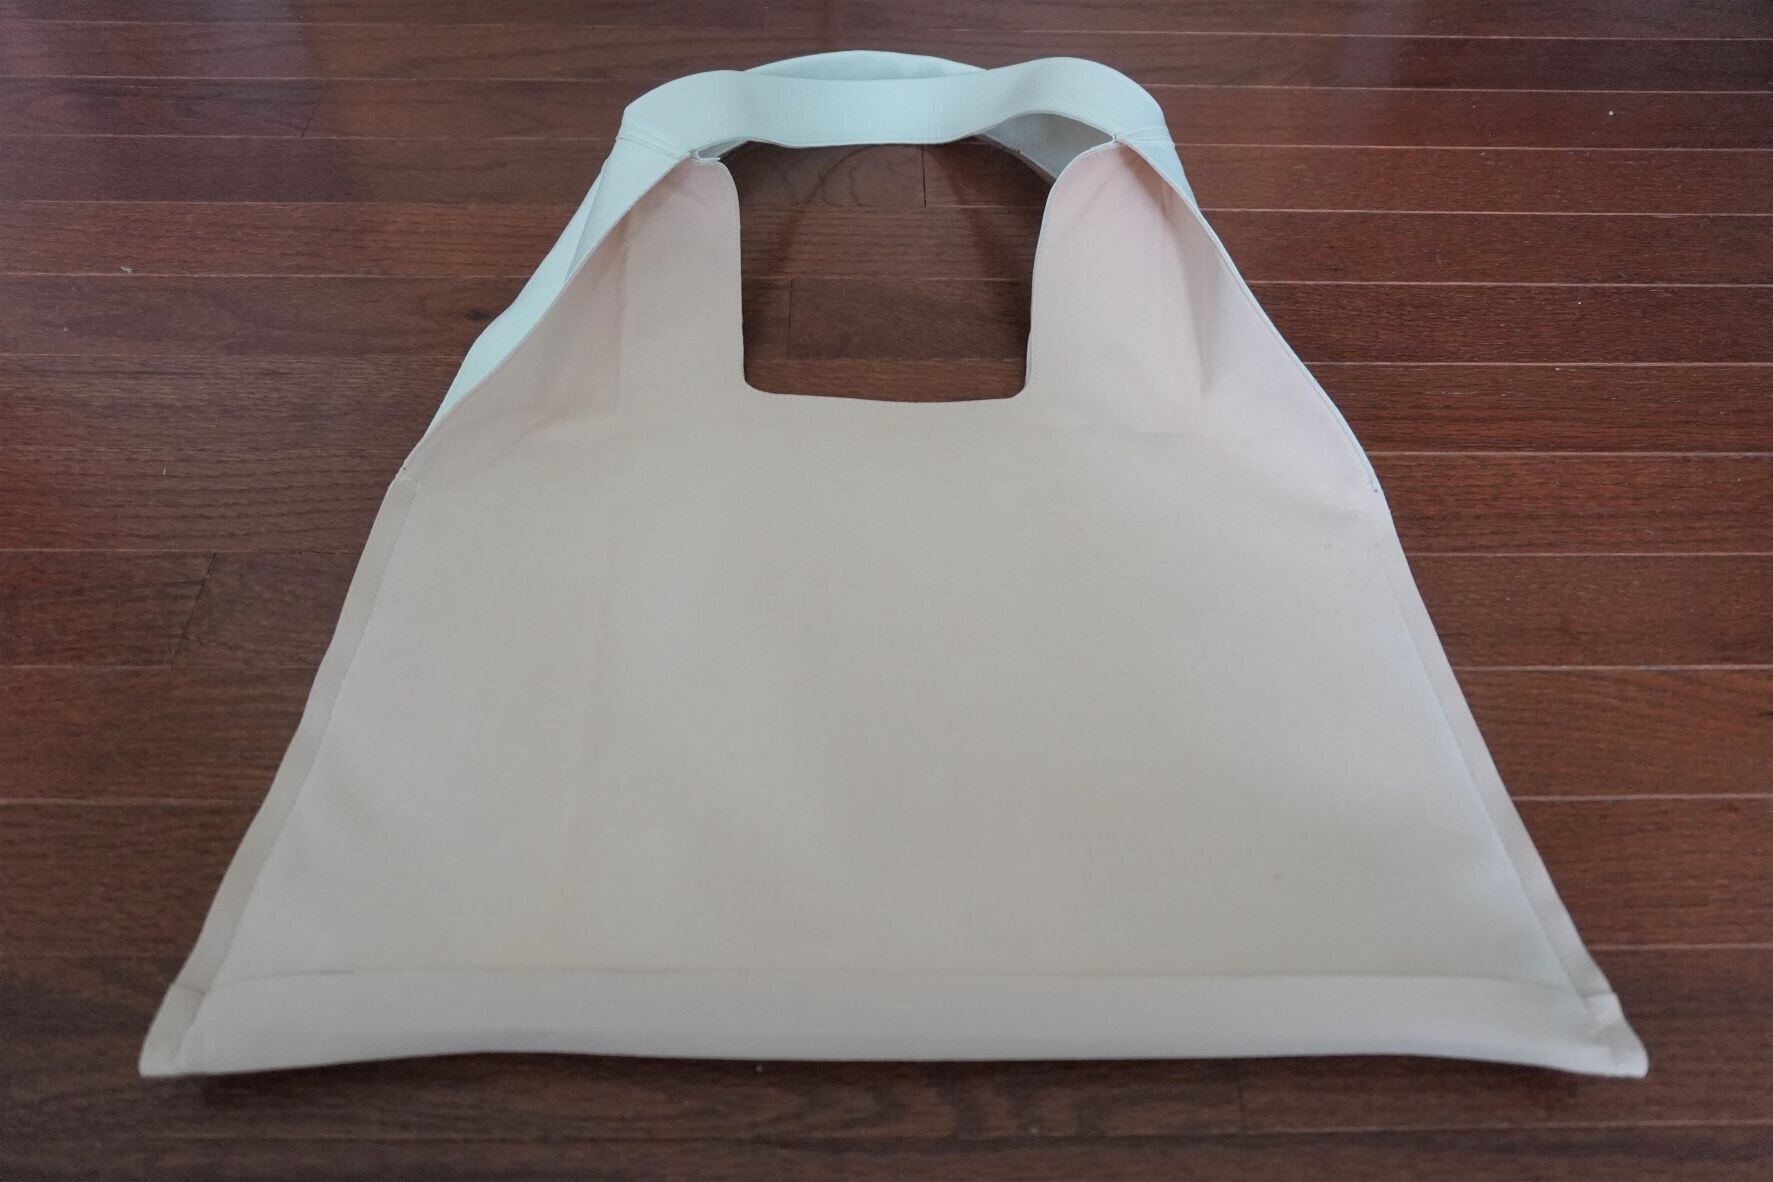
6. Turn the bag right-side out.

You’re done constructing the bag! Now all we have to do is finish the edges of the bag. We’ll tackle that in the next post.